My mother-in-law insists I bring these to every family dinner—they look super fancy, but honestly take almost no effort. Just 4 ingredients to make these little treats
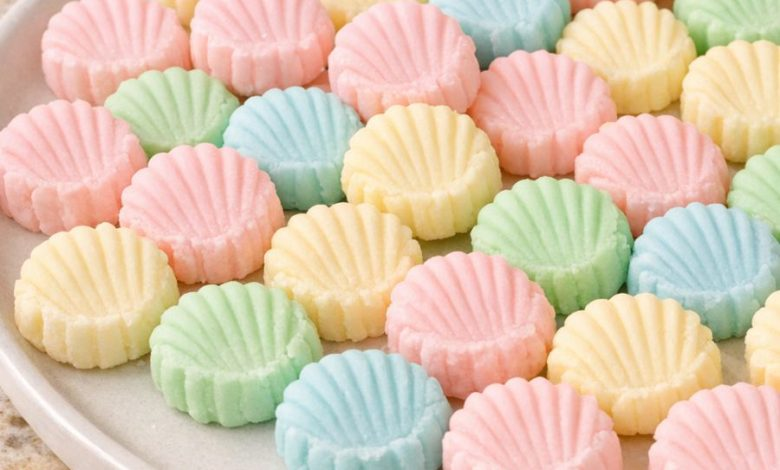
These 4-ingredient cream cheese mints are a classic confection, often featured at weddings and festive occasions. They’re loved for their smooth, melt-in-your-mouth consistency. The combination of creamy, slightly tangy cream cheese and sweet powdered sugar creates a dough that’s easy to shape yet delicate enough to dissolve quickly. A hint of peppermint extract adds a refreshing touch that balances the sweetness, leaving a clean, cool finish.
Cream Cheese Mints
Ingredients:
| Ingredient | Quantity |
|---|---|
| Powdered sugar | 3 cups |
| Cream cheese (softened) | 4 oz |
| Peppermint extract | 1/2 teaspoon |
| Food coloring (gel or liquid) | 2–3 drops |
Instructions
Step 1: Prepare the base
Line a large baking sheet with parchment paper. In a medium bowl, beat the softened cream cheese until it’s completely smooth.
Tip: Ensure there are no lumps in the cream cheese before adding other ingredients to avoid uneven texture.
Step 2: Add the flavoring
Stir in the peppermint extract. Begin with 1/2 teaspoon, as the flavor intensifies slightly as the mints set.
Step 3: Mix in the sugar
Slowly add the powdered sugar, about 1/2 cup at a time, mixing well after each addition. The mixture will gradually turn into a soft dough. If it’s still sticky, add a little more sugar until it’s easy to handle.
Step 4: Color the dough
Divide the dough into smaller portions and mix in a drop of food coloring for each portion.
Tip: Use a toothpick for gel coloring to control the amount—pastel shades are traditional and require only a small amount.
Step 5: Shape the mints
Roll about 1 teaspoon of dough into a ball and place it on the prepared baking sheet. Lightly press each one with a fork to create a decorative pattern.
Step 6: Let them set
Leave the mints uncovered at room temperature for 2–4 hours to develop a slight outer crust while remaining soft inside. For the best texture, chill them in the refrigerator for about an hour after they’ve dried.