There’s literally no point making any other dessert because everyone keeps eating this one! Seriously, a game-changer!
Peanut Butter Ritz Bits Toffee Recipe — a heavenly mix of salty and sweet, crunchy and smooth. If you’re in the mood for a simple yet irresistible dessert, this treat is sure to become a favorite. Beloved for its perfect blend of flavors and textures, this recipe delivers a melt-in-your-mouth experience that’s impossible to forget. Here’s how to make your own batch of this delicious indulgence!
🥜 Ingredients
| Ingredient | Quantity |
|---|---|
| Peanut Butter Ritz Bits crackers | 2 boxes (~18 ounces total) |
| Semi-sweet chocolate chips | 3 cups |
| Brown sugar | 1½ cups |
| Butter | 1½ cups + 2 tablespoons |
| Butter (for melting with chocolate chips) | 2 tablespoons |
👩🍳 Instructions
Step 1: Preheat the Oven
Set your oven to 400°F (200°C) and allow it to fully preheat.
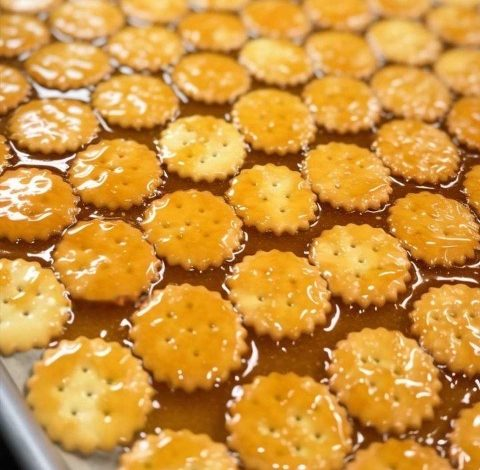
Step 2: Arrange the Crackers
Spread the Peanut Butter Ritz Bits evenly in a single layer on a large, parchment-lined baking sheet.
Step 3: Prepare the Toffee
In a saucepan over medium heat, combine 1½ cups of butter and brown sugar. Stir continuously and let it boil for about 3–4 minutes, until the mixture thickens and turns glossy.
Step 4: Coat the Crackers
Carefully pour the hot toffee mixture over the crackers, spreading it evenly with a spatula to cover them completely.
Step 5: Bake
Place the baking sheet in the oven and bake for 6–8 minutes, or until the toffee is bubbling nicely.
Step 6: Cool Slightly
Remove from the oven and let the mixture rest for about 5 minutes to firm up a bit.
Step 7: Melt the Chocolate
In a microwave-safe bowl, combine chocolate chips and 2 tablespoons of butter. Heat in 30-second bursts, stirring between each, until smooth and silky.
Step 8: Add the Chocolate Layer
Pour the melted chocolate over the toffee-covered crackers, spreading it evenly to create a glossy top layer.
Step 9: Chill
Transfer the baking sheet to the refrigerator and chill for 1 hour, or until the chocolate sets completely.
Step 10: Slice and Enjoy
Once firm, break or cut into squares and serve.