My mother-in-law taught me this trick to lift stubborn orange tomato stains out of plastic food containers with 0 effort. Here’s how it works
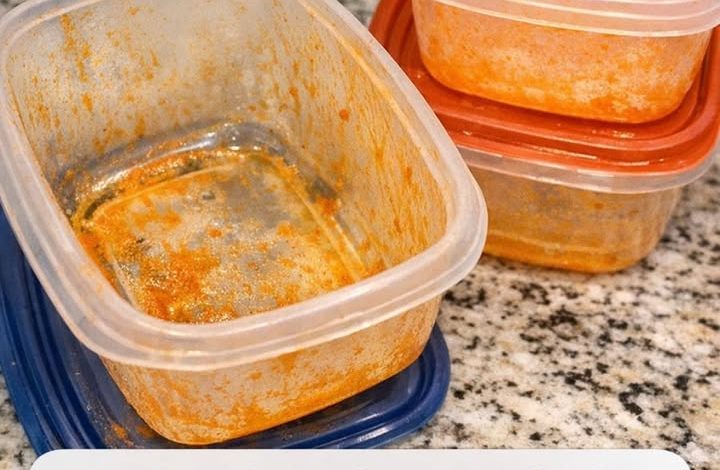
We have all experienced that frustrating moment: you reach into the kitchen cabinet for your favorite plastic food container, only to discover it has been left with a stubborn orange or red stain that refuses to disappear. Whether the culprit is tomato sauce, curry, chili, or another colorful leftover, these marks can make even a clean container look old and worn out.
The good news is that there is a simple solution that can help restore those stained containers without harsh chemicals, endless scrubbing, or expensive cleaning products.
A clever household cleaning method using everyday ingredients can make a noticeable difference. By combining gentle stain-lifting ingredients with the natural power of sunlight, you can refresh your plastic containers and help them look much cleaner again.
1. Why Plastic Containers Develop Orange Stains
Those stubborn orange marks are usually caused by natural pigments found in foods like tomatoes. One of the main pigments responsible is lycopene, which bonds easily with oils.
Because plastic is slightly porous, especially after years of use or repeated washing, tiny scratches and surface imperfections can trap food oils and pigments. When tomato-based foods are heated inside plastic containers, the warmth can cause these colorful oils to absorb even deeper into the material, making the stains much harder to remove with regular dish soap.
Understanding why the stains happen makes it easier to choose the right cleaning approach.
2. The Simple Cleaning Method That Requires Almost No Scrubbing
Instead of relying on strong chemical cleaners, this method uses a combination of baking soda, lemon juice, and sunlight.
Baking soda works as a gentle cleaner that helps lift residue without aggressively damaging the plastic. Lemon juice provides natural acidity that helps break down greasy buildup and discoloration. When combined with sunlight, the process becomes even more effective because UV rays can help fade stubborn stains naturally.
The best part is that once the mixture is applied, you can simply let it sit and allow the ingredients to do the work.
3. What You Need
You only need a few basic household items:
- 1 tablespoon baking soda
- Juice from 1/2 fresh lemon
- A small amount of warm water
- A sunny location
These simple ingredients are affordable, easy to find, and often already available in your kitchen.
4. How to Prepare the Stained Container
Start by rinsing the container with warm water to remove any leftover food, grease, or loose debris.
Next, mix the baking soda with a small amount of water until it forms a thick paste similar to toothpaste.
Spread the paste generously over the stained areas, making sure the orange marks are fully covered.
Squeeze fresh lemon juice over the baking soda mixture. The combination will begin to fizz, which is a normal reaction and helps activate the cleaning process.
5. Let Sunlight Do the Work
After applying the mixture, place the container somewhere that receives direct sunlight, such as a bright windowsill, patio, or sunny outdoor area.
Allow the container to sit undisturbed while the baking soda, lemon juice, and sunlight work together to loosen and fade the stains.
This hands-off method means you can leave it alone while you take care of other tasks.
6. How Long Should It Sit?
For the best results, leave the container in direct sunlight for at least 4 hours.
For darker or older stains, a longer treatment may be needed. Allowing it to sit for 6 to 8 hours or even a full sunny day can provide stronger results.
The amount of time needed depends on how deeply the stain has absorbed into the plastic and how strong the sunlight is.
7. Rinse and Reveal the Results
Once the waiting period is finished, bring the container back inside and rinse it thoroughly with warm water.
Use a soft sponge to remove any leftover baking soda residue. There is usually no need for heavy scrubbing because the treatment has already loosened the stains.
Dry the container completely and check the results. Many containers will look noticeably brighter, with the orange discoloration greatly reduced or completely removed.
8. Handling Extra-Stubborn Stains
Some older stains may need more than one treatment.
If a slight orange tint remains after the first attempt, simply repeat the process with a fresh mixture and place the container back in the sunlight.
For particularly stubborn marks, adding a small amount of white vinegar to the cleaning mixture may provide additional stain-lifting power.
9. When It Is Time To Replace a Plastic Container
Even the best cleaning methods cannot fix containers that are damaged beyond repair.
Inspect your plastic storage regularly. Deep scratches, cracks, warping, peeling surfaces, or lingering odors can make a container less suitable for continued food storage.
If a container has become heavily worn, replacing it may be the safest choice for keeping food fresh and reducing the chance of bacteria buildup.
10. How To Prevent Future Stains
Once your containers are clean again, a few simple habits can help prevent new stains:
- Rinse containers soon after using them, especially after storing tomato-based foods.
- Avoid heating colorful foods directly inside plastic containers.
- Transfer hot leftovers to glass or ceramic dishes before microwaving.
- Lightly coat the inside of containers with a small amount of cooking spray before adding heavily pigmented sauces.
- Consider using glass storage containers for foods that commonly cause staining.
These small changes can greatly reduce future discoloration.
11. Other Household Items This Method Can Help Clean
This baking soda, lemon, and sunlight method is not limited to plastic food containers.
It may also help refresh other stained kitchen items, including:
- Plastic cutting boards
- Silicone utensils
- Rubber spatulas
- Certain kitchen accessories
- Stained dish towels
With a few simple ingredients and a little patience, this natural cleaning approach can become a useful trick for keeping everyday household items looking fresh and clean.